Tuesday, November 10, 2009

photo shoot themes - Little Red Riding Hood

I did a theme photo shoot last week, and it turned out pretty well. Photo Shoot Themes is the direction I really want to take my photography. I will always be involved with other aspects of photography, fashion photography, artistic interpretation, etcetera, but generating Theme Photo Shoot ideas is a lot of fun. The creative payoff really is much more rewarding to me than other shooting styles. So be forewarned. You can plan on seeing a lot more of this style of shooting from me in the future.

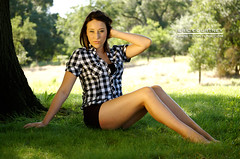
249/365 - Little Miss Red

For this particular shoot, I contacted a pinup model to give Little Red Riding Hood more of an edgier look and feel. As well as some sex appeal, I must admit. Sacramento model, Linda Del Sol of the Vicious Betty's Pinup Dolls was available and willing to take on the role. I have worked with Linda before at a few live events, but until this shoot, I never got the opportunity to work with her 1-on-1. It was a good experience, but I wish we could have started earlier in the day.

For a shoot like this, I insisted on using evening magic light (twilight hours, for those of you who don't already know what Magic light is) because I had a few ideas that I wanted to work with. Some ideas required sunlight, some required partial darkness. I scheduled the shoot just days after the Daylight Savings Time switch-back for a 3:00pm start, which would give me a few hours workable light. Unfortunately...

Little Red - The Axeman Cometh

Time would fly by faster than I anticipated; It's amazing how fast that big ball of fire in the sky falls when you're trying to create visual excellence. I did scout the locations the day before the shoot, but I don't feel I planned as effectively as I could have. I say that because even though I planned the shoot in segments around the locations as I was scouting, I found myself improvising much more than I would have liked during the actual shoot. I think the recent time change had a little bit to do with it. So the message here, I guess, is to try and plan a little for the "unexpected" during your preparations. I plan to blog about location scouting and preparations very soon.

Wardrobe was a no-brainer for this shoot. I chose an experienced pinup model because I knew she would be able to provide the bulk of the wardrobe for an edgy-sexy fairytale parody. The only other items I needed to get my hands on were a cape and a basket of goodies... And an axe of course because my plans had a dark element involved. Yes I am grinning as I write this.

I enlisted the help of a local fashion designer, Naomi May Designs, to create a cape for me that would work along with the wardrobe Linda was planning to wear. As for the props, it only took a little rummaging around the house to find a basket and axe. I should also mention that the great thing about hunting down props is that you will find other things that inspire ideas for future shoots. Keep a creative mind-set when prop hunting. It will pay off!


Linda did a great job for this scenario shoot. I like to call Photo Shoot Themes "scenario shoots." Scenario shoots, or a Theme Photo Shoot if you insist, is a lot different when it comes to directing your models. Instead of a model bringing an arsenal of high fashion poses and looks, you want her and/or him to be able to provide you with facial expressions and body language relative to the scenario they are creating. A model with acting experience is probably more often than not, and ideal fit for a shoot of this nature. I think it is important to let a model know before you hire her that what you expect of her is completely clear. That way everyone on both sides of the glass knows what to expect.

As you can see from the pictures displayed in this post, I got a few shots I am pretty happy with. If you would like to see a few more from the Little Red Riding Hood Shoot with Miss Linda Del Sol, check out my Sacramento Photography website. If you want to go straight to Linda's gallery, surf to the Little Red Riding Hood Gallery. I hope you enjoy it, and I look forward to any feedback you may provide.

Sacramento Photographer

Eric Courtney

If you like this article, please link to it.

Recent Articles:
Sacramento Photographer gets Artsy with Artistic Photographs
Photo Coloring - Coloring black and white photos effectively
Shooting Outdoors and Beating the Summer Heat
MUAH Hair and Makeup for Models
More Creative Photography Please...
Test Shooting
5 Easy Tips to Improve Portraits of Children
Camera Shy Subjects - The Art of Dealing with Photo Portrait Nightmares
Post Processing for Portrait Photography


Wednesday, October 21, 2009

Sacramento Photographer Gets Artsy With Artistic Photographs

While keeping busy with my portrait photography in Sacramento as well as a few recent visits to San Jose and Santa Cruz for photo shoots of various models, I am also keeping my thirst for creating artistic photographs of the abstract and modernized varieties quenched. I like all kinds of photography, but every now and again I like to play with motion and light.

220/365 - Single Malt (fabric series)

I get a lot of people asking me how I get my artistic photographs to look like fine art work. It is really quite easy, and I hope to produce a detailed tutorial soon. While the post production work can be quite extensive to make the images effective looking, the process of getting the capture in your camera is very simple.

What I am doing to achieve this effect is nothing new or secretive to the photography world. I assure you it is very common, and all it requires is to set the shutter speed on your camera low enough to display motion in your images. If you're thinking you need to set up a tripod, you don't. The hand-held slow shutter speed is the magic behind the motion in these images.

215/365 - Crossing Worlds (piece #4)

The fun part about this type of artistic photography is that you may think you have an artistic photograph that is really good before you get to the post processing phase (editing) of creating the art, but then it doesn't turn out as well as you think it will. On the other end of the spectrum, more often then not, you will be pleasantly surprised by images captured that appear to have no meaningful use. Most my favorite pieces have been captures that I felt didn't stand a chance in the post process phase.

It is so cool when something special emerges from something you would typically delete before you upload your card to your computer. That being said, I question myself before I delete any images from the camera's memory card. It's almost like throwing away a lottery ticket before you scratch off the surface. It's probably a loser, but there is always a chance it's a winner.

217/365 - Intro to the 60s (TV Art Series)

I am hoping that I can squeeze enough time out of my schedule to do a lot more artistic photographs during the rapidly approaching winter. Stay tuned for my upcoming posts. I have information coming on a couple of dark shoots I have recently completed and have yet to do this month. Then I will be announcing my Holiday Packages. Great stuff coming soon! Thanks for reading.

If you like this article, please link to it.

Cheers!

Sacramento Photography

Recent Articles:
Photo Shoot Themes - Little Red Riding Hood
Photo Coloring - Coloring black and white photos effectively
Shooting Outdoors and Beating the Summer Heat
MUAH Hair and Makeup for Models
More Creative Photography Please...
Test Shooting
5 Easy Tips to Improve Portraits of Children
Camera Shy Subjects - The Art of Dealing with Photo Portrait Nightmares
Post Processing for Portrait Photography

Tuesday, August 18, 2009

Photo Coloring - Coloring black and white photos effectively

Photo coloring has become more and more popular with the digital revolution, and the number of touch up artists in the last five years has grown at a staggering rate, but when do we tell ourselves enough is enough to coloring black and white photos?

This post may come off as more of a rant than an informative how-to lesson, but this topic just seems to eat at me whenever I see another decent photograph that has been butchered with color ineffectively. Just to set the record straight, I am an artist first and photographer second, and I would be the last person on earth to try and squelch the creative expression of anyone that is exploring technique and their own artistic identity. I wouldn't tell you that you are wrong, I'm saying that I feel there is a better way. That being said, let's get down to what's bugging the hell out of me.

Coloring black and white photos effectively requires a keen eye and a mild sense of restraint. Of course this whole post is based on my own philosophy, so if you find yourself guilty of some of the following observations and conclusions, please don't take it personal. I'm just expressing my own creative interpretation of the medium.

I personally don't see the need to add color to certain black and white captures, but I have in the past, and I have seen many images by other photogs that have had color added quite effectively to produce an image that benefited greatly from the post processing work. It seems to be the color, "just to color it," mentality is why the problem exists.

I see time and again numerous B&W photos that have color added, just to have color added, when it really makes no logical artistic sense to place it in the capture to begin with. And here's why:

Say you have a black and white wedding photo of a bride and a groom standing in a rose garden, and you think it would be cool to color each and every rosebud surrounding them in red. Once you color all the roses in that photo, you have completely altered the way the photo was intended to be viewed. The subjects, the bride and groom, have now become the background for the new subject, the roses. Why? Because the roses are the only source of color, and the strongest level of contrast, in a black and white image. While the viewer should be admiring the beauty of an intimate mood between two humans sharing a moment of bliss, the viewer's initial focus is being drawn away from the primary subjects to the static and mundane, yet beautiful, existence of roses surrounding them.

Another example that drives me nuts is when clothes or accessories on a person have been colored, yet they leave the subject's skin tone in a beautiful scale of... GRAY! Or "grey" if you prefer the bluer version. Regardless... Unless you are advertising a clothing line, or accessory brand, it doesn't make any logical sense to steer the viewers focus away from the "living" subject and instead to the lifeless fabric that is covering him or her. The shots I love most (and yes that's sarcasm)? Grayscale girls in bikinis... Nothing says a day at the beach like a woman with a #666666 hexadecimal (that would be a medium toned gray) tan in a Sunglow Orange bikini. "Hey look! It's a dead girl in a bikini!" I guess if you want your subjects to look like black & white zombies while their blood drenched clothing pops out of the photo in a beautiful crimson hue, that would be acceptable... Heck that might even be pretty cool. But that is planning not often pondered when somebody decides to paint their photographs.

Ok so that is a couple of negative examples of coloring in my opinion. How could someone improve those scenarios? First off, if you want to dabble around with color on black and white in post processing, you really should plan for it before you shoot the event or series. That way you know you are going to produce something that will make sense when you get to the post work process.

Take the first example. The photo described is probably not the best choice to add color. But say you have a tight closeup portrait of the couple holding a single rose together, and they are both admiring it's beauty, coloring the rose would make sense. Why? Because the human subjects in the photo are steering the visual flow of the image toward the flower. Another option could be to capture them looking into each other's eyes while their wedding bands are prominently displayed. Coloring their wedding bands gold would be a great way to display the symbolism of their engagement and commitment. Another words, it fuels the story of what's happening in the image. It supports the image instead of confusing it.

For the second example of coloring clothes or accessories, again planning should be part of the process. I would only color clothes and leave the skin tone in black and white if it were for advertising purposes. For example, if you're on assignment shooting a clothing line or casual promotional wear for a company, by all means... Make the company's clothing or logo stand out in color while everything else in the image takes a back seat in black and white. That's an effective use of the medium and effective marketing.

For artistic purposes, I would consider coloring accessories or clothing in a black and white photo, but I would be sure not to take any attention away from the "true" subject. Here is an example of how I might color a B&W image. If I was shooting a female model, and she had some wicked-cool earings, I would be sure to bring her eyes out with color as well as her earings. That way I know I am covering the primary focal point of the image's visual flow (her eyes) and not diverting it away from the model's eyes directly to her earlobes.

That is basically how I feel about photo coloring. The point I am trying to make about coloring black and white photos is that you should plan to color before you just decide that a certain part of a photograph could use some color. Think about what part of the photograph is the most important before you decide to make a change, and think about how you will affect the image once you decide to change it. The first question I would ask myself is, how well does this image stand on its own merit (without any change)? Then... Then let common sense guide your way.

I hope you found this article interesting. If you do, please link to it

Cheers!

Sacramento Photography

Recent Articles:

Shooting Outdoors and Beating the Summer Heat
MUAH Hair and Makeup for Models
More Creative Photography Please...
Test Shooting
5 Easy Tips to Improve Portraits of Children
Camera Shy Subjects - The Art of Dealing with Photo Portrait Nightmares
Post Processing for Portrait Photography

Wednesday, July 29, 2009

Shooting Outdoors and Beating the Summer Heat

Shooting outdoors in extreme heat can be much more dangerous than you may think. I'm living in Sacramento (obviously) where it is not uncommon for the temperature to soar well above 100 degrees Fahrenheit. If you're not properly prepared for shooting in those conditions, you and your subject(s) could run into a situation that could end your session early. If you ignore all common sense, it could even lead to a situation that is life threatening.

If you're preparing a shoot during the summer months where you know the location outside can get very hot, planning well ahead of time can get you positive results. If you are not stuck to a firm date, postpone the shoot for a day or two when the weather is expected to improve. If you don't have that luxury, here are a few tips that may seem obvious to most photographers, but often get taken for granted...

1) Hydrate!!! Always drink plenty of water before the shoot, and always bring plenty of water with you to a shoot (for you AND your models). Don't assume someone else will bring some.

2) Don't plan your shoot during the middle of the day when the heat is at it's peak. Plan your shoot for the early morning or the early evening. Not only is it cooler during those times, but the light is much, MUCH, better for photographs. Also... Try to plan the shoot for an hour or two at the most on days with extreme heat.

3) If you have to shoot during peak heat, shoot models in the shade. The fastest way to kill the quality of your shoot is to cook your models. Keep them out of direct sun as much as possible. If you need to back-light your model with direct sun, work them in short sessions while moving them to the shade every few minutes. If you don't, you will soon find you have sweaty models with sun-beaten hair and melted makeup.

4) Protect your equipment! Do not leave your camera or camera bag in the direct sun for too long. Want to ruin your pricey photography investment in a hurry? Let your bag sit in the 100 degree sun for any extended length of time. Keeping it locked in a car can be even worse. Keep your equipment on you. That way when you need to cool off, your camera and glass gets cooled off at the same time.

5) Choose a location near a river, lake or the ocean. If you need to cool off quickly, you have a big body of water at your beck and call. You can also shoot your subjects having fun in the water as well. A fellow photog I know, Mark Behrens, hosts regular "Trash the Dress" photography workshops during the summer months. If you're scratching your head, he basically hires models to wear extravagant dresses while they wade around in a pond or stream. Photographers then have the option of shooting the models from the shore or actually getting into the water themselves. Not only do his participants walk away with killer shots, but they have a most pleasant experience during a hot day.

Like I said, some of these tips are obvious. It is, however, amazing how often we can neglect common sense. I have done two recent mid-day shoots in temperatures over 100 degrees, and I can honestly say that it could have been much better had I planned them with a little more attention to detail. The first of the two shoots, I had to end early because my model was showing signs of heat exhaustion. The scary part is that I didn't shoot her in direct sun at all. The heat in the shade can be dangerous as well, so be careful out there.

Symptoms of heat exhaustion include: Heavy sweating, paleness, muscle cramps, tiredness, weakness, dizziness, headache, nausea or vomiting, fainting.

Hope you find this article interesting. If you do, please link to it.

Cheers!

Sacramento Photography

Recent Articles:

MUAH Hair and Makeup for Models
More Creative Photography Please...
Test Shooting
5 Easy Tips to Improve Portraits of Children
Camera Shy Subjects - The Art of Dealing with Photo Portrait Nightmares
Post Processing for Portrait Photography
Wednesday, June 3, 2009

MUAH - Makeup and Hair for models, and why it's important.

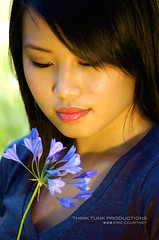
MUAH (Makeup And Hair) - If you want great portrait photos, you got to have a great hair and makeup artist. Sure a photographer can get good shots of a model who is sporting the "every-day" hair with minimal or no makeup, but if you really want to make an impression on potential employers/agencies who are viewing your portfolio, you need to make the investment to have a professional hair and makeup artist make you look great!

I had an interesting experience lately, when a young model approached me to do a shoot. I viewed her portfolio online, and I noticed that she wasn't wearing any makeup in her photos. She is no doubt a beautiful young woman without makeup, but I had to ask her why she was modeling without. She informed me that she didn't wear makeup and that she had maybe worn it twice in her life. I informed her that if I was going to do a shoot with her she needed to apply some color to her face. On the day of the shoot, I sent her to a solid hair and makeup artist, and she turned out absolutely stunning. And most importantly... She knew it. The shoot went well, she was confident from the first click of the shutter, and she was overwhelmed by the quality of work. I recently found out that she wants to use the same MUAH artist for a future shoot.

Of course the example above is a drastic scenario, but the same results can be obtained by even those models who wear makeup on a regular basis, who go to a trained professional for improvement.

What models can expect when dealing with photographers

Many photographers provide this service for models within the scope of their shoots. Some photogs insist models take care of it on their own before they get to the shoot. Regardless of the situation, the model should take it upon him/herself to see that they are looking the best they can possibly look for a photo shoot. As a model, you can always ask a photographer if he/she will be providing it for the shoot. If not, and you don't have have a regular MUAH artist of choice, you can ask the photographer. Experienced photographers tend to work with hair and make up artists who provide solid results time and again. So if you like a particular photographer's style of work, taking his/her guidance would be best to guarantee optimal results.

There can also be a lot of confusion when it comes to the type of shoot the model is engaging in as well. If the Photographer you are shooting with has a particular genre in mind for the shoot (i.e. pinup retro style, alternative, dark art, or high fashion), and you are on your own to find a quality hair and makeup artist, you should be looking for a MUAH artist who specializes, or has significant experience, in that particular style. More often than not, the photographer can point the model in the right direction.

Need MUAH on a budget?

If you are on a tight budget, and you are willing to sacrifice a little quality talent, there are many young talented make up artist portfolios on the web that need improvement. Those makeup artists will often work for straight trade, or trade with a minimal kit fee (usually around $30, their cost) to build their own portfolio. Basically the model would provide copies of the media received, by the photographer, to the MUAH artist for services rendered. The model should always be clear on what the makeup artist will be getting in trade.

Makeup Artists "AND" Hair Stylists

It is not uncommon to find a makeup artist who doesn't do hair, or a hair stylist who doesn't do makeup in model photographer circles. So if a model books a hair stylist for a shoot expecting to get makeup, he/she should clarify those details up front. The same applies, of course, when booking a makeup artist and expecting to get hair done.

Network!

I can't stress the importance of networking with your connections enough. It's easy in this industry for toes to get stepped on (sorry for the cheesy cliche), so always continue to communicate with those you meet who can benefit your efforts. If you appreciate the work someone does for you, show your appreciation by whatever means you can afford such as money, referrals, advertising, photos, testimonials, etc. Just Communicate!

I hope you enjoyed this article, if you did, please link to it.

Cheers!

Sacramento Photography

Recent Articles:

More Creative Photography Please...
Test Shooting
5 Easy Tips to Improve Portraits of Children
Camera Shy Subjects - The Art of Dealing with Photo Portrait Nightmares
Post Processing for Portrait Photography

Wednesday, May 20, 2009

More Creative Photography Please!

Why play it safe when planning your photos retouch work. Just because the photo came out of a camera a certain way doesn't necessarily mean that you should only spend a little time to touch up the photo to keep it as close to the in-camera result as you can. There is nothing wrong with expressing your creative freedom to get a quality look that you are happy with.

There are two popular types of philosophies shared by creative photographers. There is the purist who believes in-camera technical settings rule over any post processing creative freedom. Another words, a photo should look exactly as the camera produces it with little help in post production. When I say little help, I mean minor color correction and brightness/contrast adjustments as well as cropping. The integrity of the frozen moment in time should be the art of photography-technical know-how at his purist form. Most professional photographers who stick to this rule can accomplish their needs, please their clients, and save a lot of time by avoiding time intensive post production work.

The other philosophy shared by creative photographers is that of the self-proclaimed artist, photo enhancement specialist, touch up artist, or whatever cool sounding title you can think of. This philosophy is based on taking a photograph that is good and making it much better through post production, including obvious changes that would obviously never be performed by a photographer who prides himself on the purist philosophy. This photographer prides themselves on the fact that they know they will be spending a lot of time at the computer making basic cosmetic enhancements to all out metamorphosis with their photos. This creative photographer wants to be sure that he/she has left a lasting impression on the photo by altering it through his/her own creative vision.

While I can appreciate both philosophies, I tend to lean toward the latter philosophy. With the emergence of technology, you really can make a believable square wheel nowadays; well, you know what I mean... And I have always had that itching mentality as to how I can get something to look even better than it does in it's current state.

I should mention, however, that I am not condoning the practice of settling on taking crappy pictures just because you know you will be editing them in Photoshop later. That is indeed a tremendous waste of time. It's very important that you use solid shooting techniques, so you have the best possible photographs to work with before you get to the post production steps.

I think the ultimate point I am trying to make is that you shouldn't let anybody, including your art teachers or professors, tell you how your images "should" look. Believe it or not, this applies to both philosophies. Make your work/art your own. Express yourself freely and be proud of your accomplishments!

I hope you find this article interesting. If you do, please link to it.

Recent Articles:

http://california-photography.blogspot.com/2009/05/test-shooting.html
5 Easy Tips to Improve Portraits of Children
Camera Shy Subjects - The Art of Dealing with Photo Portrait Nightmares
Post Processing for Portrait Photography

Friday, May 15, 2009

Test Shooting

Test shooting in portrait photography is interpreted many different ways in regards to a model test shoot. After doing a little browsing around on the subject I see that there is still information online that is quite dated and doesn't really apply anymore with the evolution of digital photography. I am going to share my philosophy behind test shooting and how models and photographers can benefit.

What is a test shoot? Simply put, a test shoot for the photographer is a means to get acquainted with future talent and/or test photography equipment. For a model it is to start or generate a quality model portfolio quickly on a budget and introduce themselves to the industry. Although it is not uncommon for experienced models to participate in a test shoot, that is basically it in a nutshell.

069/365 - Allyson


Test shoots are almost always done on a trade agreement; an investment of time straight across for both photographer and model. As payment for the models time, the photographer typically provides the model with copies of the photos that were taken during the shoot. As payment for the photographer, a photog gets a beautiful subject to work with, the opportunity to work with a potential long term client, as well as knowledge to improve skills and portfolio. TFP and TFCD are popular acronyms that go along with test shooting in the photographers models world. TFP stands for Trade/Time for Prints (printed photos of the shoot), and TFCD stands for Trade/Time for Compact Disc (CD or DVD that contain photos from the shoot). While these types agreements often go beyond test shooting, when a Test shoot is offered or suggested, trade should always be considered by both parties. But don't take it personally if you are turned down.

Photographers Model - As a photographer, when I do a test shoot with a model, it is usually to figure out a couple of things. The first thing I want to figure out is how much experience he/she has in front of the camera. If the model is relatively inexperienced, and could use a lot of improvement in their modeling skills, as well as taking direction from a photographer effectively, it doesn't make sense to invest time and money into a large setup that requires all the elements for a nice shoot. Those elements could be a nice location, hair and makeup, and wardrobe to name a few. Taking the time and money to set all that up while running the risk of getting mediocre results at the very best can be avoided by doing a test shoot before hand.

The other thing I like to figure out is how to improve my own technique when working with models. Trying something new and different, or trying to improve on something that didn't turn out as well on a previous shoot. That can include posing, angles, camera settings, and most importantly... Communication. Communication is paramount.

Of course another good reason for a test shoot is new equipment. If you have a new camera or flash gun, and you want to put it to good use right away, scheduling a test shoot is very effective to understand the different nuances that come with new equipment.

Tiff - Color Flower


Models Photographer - Test shooting for new, young, and/or up and coming models is a great way to build a portfolio fast on a minimal budget. A great way to get quality images for their portfolio quickly is to introduce themselves to reputable photographers who produce high quality images. Nowadays a good place to achieve this goal is to browse modeling photographer networks online where you can view photographer profiles and portfolios. Models should be prepared to provide images upon introduction.

One very popular network in the industry is Model Mayhem. As a model you can sign up for an account as long as he or she meets the minimum requirements.

A model shouldn't be surprised to find a good number of inquiries from photographers to set up a shoot over a few simple introductions. In some cases, it's quite possible a new model could be booked right into a major commercial shoot right out of the gate without any mention of a test shoot. Not everyone will experience such fortunate timing, but it happens.

If a model really likes a photographer's portfolio, it never hurts to express appreciation in an effort to fuel the incentive to work with him or her (insert small photographer chuckle here). It's quite possible you will generate some long lasting successful business relationships from just a simple test shoot.

Regardless of what type of shoot, models should be up front with the photographer, and vice versa. Inform them of personal boundaries and expectations, if needed, to avoid anything that might make the shooting scenario uncomfortable. Having a fun test shoot means optimal results as well as a promising business relationship.

The Details:

The details of the shoot should always be arranged up front as to the type of the agreement and what both parties will get out of the shoot. Even though it is a test shoot, models should be prepared to sign a model release. Photographers should also provide clear instruction on how, and how long, copies of the images will be distributed to the model(s). Test shooting is typically a 1-2 hour shoot, although I have heard from models that they can go on much longer. It's probably a good idea, for both parties, to have an idea of the time frame before the shoot actually takes place.

I hope you find this information useful. Please link to it if you do. Check this out: Photography Posing Secrets

Sacramento Photography

Recent Articles:

5 Easy Tips to Improve Portraits of Children
Camera Shy Subjects - The Art of Dealing with Photo Portrait Nightmares
Post Processing for Portrait Photography

Tuesday, May 12, 2009

5 Easy Tips to Improve Portraits of Children


In my experience, I must say that when it comes to portraits of children, the most important part of the shoot is keeping them entertained throughout the process. Once you lose a child to boredom, it can be very difficult to win back their attention and keep it.

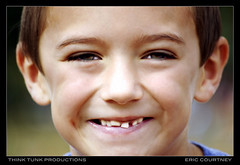
Loose Toof!


I don't shoot an overwhelming number of portraits of children, but when I do get the opportunity to shoot children portrait photography, I am always looking for new ways to entertain my young subjects. Although different techniques work better for different age ranges of kids, here are 5 basic tips that I have found to be effective when working with kids.

1. Squeak Toys: For younger children, a squeaky toy can be a photographers best friend. Kids love the sound of funny noises, and they typically react positively toward them. If you're going to use squeak toys, try to keep them small. You want your subject to hear the noise, not beg you to hold the giant dog toy making the noise through the entire shoot.

2. Cartoons: Older children can be very passionate about their favorite cartoons or superheroes. Ask a couple of questions about their favorite cartoons, and you will be amazed by the animated emotions you can draw out of them (sorry for all the puns there).

3. Something Shiny: Babies tend to find shiny objects interesting enough to stare at for long periods of time. Whether it is a set of car keys, a small compact mirror or jewelry, you can usually use it to get their eyes to look in a certain direction long enough to get some good shots.

4. The goofy Face: I use this one most, but you have to be careful with this one. This one can easily backfire on you if you don't use it properly. You need to make a game out of it. What I will do is make a goofy face at them. If they smile, great! I snap the shutter. If they don't, I dare them to make a face goofier then the one I just gave them (and they usually take the bait). When they make the goofy face, I snap the shutter and immediately claim, in a joking voice, that I didn't mean to take a picture of that goofy face or that he/she may have broke my camera because that face was so scary. That kind of reaction often gets them to giggle or laugh. And it is at that very moment, you should be clicking the shutter.

5. The secret weapon: When everything else fails, and you just can't get them to smile or react the way you want them to, this timeless entertainment device works every time. Enter the comedic excellence of... The Whoopi Cushion. That's right! The old fart bag. Place it under your arm, and squeeze it against your torso to let out a nice burst of noisy air that will surely make your subject(s) laugh and smile. Of course you'll want to play off the noise by asking your subject(s) if they just did that. This may seem a bit crude to some people, but when your desperate for results, reaching down for a little harmless potty humor can work wonders. And let's face it, farts are funny!

These are things that have worked for me in the past, and techniques that I will utilize in the future to improve my portraits of children, and I am always open for new ideas. I would love to hear some other techniques photographers use to get great results for children portrait photography. Please share what works for you.

Sacramento Photography

Recent Articles:

Camera Shy Subjects - The Art of Dealing with Photo Portrait Nightmares
Post Processing for Portrait Photography
Portrait Photography in Sacramento, California

Sunday, May 10, 2009

Camera Shy Subjects - The art of dealing with photo portrait nightmares

A camera shy subject can be a very frustrating ordeal for a photographer trying to take a photo portrait. There are a many different reasons why a subject reacts to the camera in a certain way. Some people love having their photo taken, some feel a serious wave of anxiety roll over them when someone starts pointing a camera in their direction. The latter is where it sometimes becomes a difficult situation for a photographer, or anyone who would just like to get a snapshot of a family member or friend.

I am sure the vast majority of people who will read this have come across an encounter where someone has held a hand in front of their face so you could not get a clear shot of the moment you were trying to capture. It could be that they don't find themselves to be physically attractive in general, or they don't feel presentable for a photograph at that particular moment, or they even have a genuine fear of cameras. I don't know if there is an actual phobia for fear of cameras, but I do know that there is a phobia called Ophthalmophobia. That is the fear of being stared at, and that could easily be a reason why someone would react negatively to a big giant lens pointing at them and making noises whenever the shutter is clicked.

It's pretty safe to say, that if you can not help the subject overcome this temporary, or permanent, bout of camera shy behavior, your photos will suffer as a result. A good photo portrait requires a relaxed subject, in other words, a scenario that doesn't appear to be forced. Even when people pay a portrait photographer for photo portraits, coming across a case of camera shyness is not uncommon. Regardless of the elements creating the tense moment, it is important that you find common ground with the subject.

Finding common ground is using communication effectively to find something you and the problematic subject can relate to. Telling your subject to relax and smile, or begging them to give you the look you want is not going to work to your advantage. More often than not, it will make the situation worse. Trying to help someone, who is uncomfortable, feel relaxed can be quite rewarding at times. Striking up light conversation, and not over-communicating, will often get you the results you're looking for.

Here are a few tips I can offer up to help in this situation:

1. Put down the camera. That's right. Put down the camera and talk to your subject. Take a few minutes to get to know your subject. Find common ground.

2. Find common ground. I usually ask a subject what they like to do in their free time, what hobbies they have, or mention a current event in the entertainment world (almost everyone enjoys television, music, or going to the theater). Try to keep the conversation on an upbeat keel. You want your subject to smile and laugh. Talking about negative things like death or politics won't work as well as the lighter side of things like Jon Bon Jovi hosting Saturday Night Live or a referrance to a scene in the movie Meet the Parents starring Ben Stiller and Robert Deniro. As long as you can get them talking, and fuel the conversation with questions that don't obligate the subject to provide you with a yes or no answer, you are well on your way to winning their trust.

3. Pick up the camera and wait. Once you have your subject motivated to speak openly without being nudged, pick up your camera. Don't immediately point it at your subject. Make sure he or she is continuing to converse with you while you are holding the camera. Keep the conversation going while holding your camera (this is a great time to double check your settings). You should be able to tell when the subject is starting to relax.

4. An animated expression is your green light. Once you have your subject expressing themselves beyond standard conversation, there's a pretty good chance that your subject is a little more comfortable than they were minutes earlier. Make sure to show the same level of appreciation for the expression they are exhibiting and point your camera. It's very important that you continue to talk to your subject while the camera is hiding your face. Keep the conversation going, and take a couple of shots. Tell your subject they are just test shots to check your settings if you feel the need, but keep them talking!

5. Reward the subject for their trust. Once the subject has heard the shutter click a few times during your conversation, you should be able to start suggesting subtle direction. Compliment them for their participation (i.e "dip your chin a little. Great, yes just like that. That looks great"). Once you know you have their undivided trust, you can get into more complex direction. Make it fun.

I realize the above tips may not be a sure-fire method every time, but they have proven to work great for me when needed during portrait photography sessions. I also think it's fair to say that some stones are harder to turn than others, so you may have to use other methods that will help you get to where you want to go, and don't take it personally if you fail at all your efforts. The only one truly missing out on the opportunity is the subject. There will be other days with other subjects.

Stay tuned for my article on tips for better portraits of children. It will cover generating trust with kids and keeping their attention.

Recent Articles:

5 Easy Tips to Improve Portraits of Children
Post Processing for Portrait Photography
Portrait Photography in Sacramento, California

Wednesday, May 6, 2009

Post Processing for Portrait Photography

Even though the models in Sacramento are stunning in their own right, it is still no excuse not to at least put some effort into making them look even better once you have their image in your digital darkroom. That would be your computer, if you're wondering. The purists out there who are still using film have a much more difficult, and tedious, task of improving photos in post processing. I can certainly respect their passion and commitment to the original craft, but for this articles sake, I am addressing the trendy and lazy. Ok so maybe not lazy, but let's just say that anyone who is familiar with the inner-workings of a darkroom, who is now using digital, knows how much time they are now saving by plugging their camera into a computer.

There are many software applications that have been developed with a photographer's needs in mind. Some complex, some that have more of a gimmick attraction to them. Some right out of the box can smooth a models skin and remove blemishes with just the click of a button, as well as some applications that will let you easily manipulate photographs into strange shapes, collages or effects. Check out the software section the next time you are at your favorite computer store, and you will be amazed at the number, and variety, of applications for photographers and artists of visual media. It's really hard not to salivate.

While playing with new software is fun for everyone, and I definitely condone the use of multiple applications for your post processing needs, I would suggest that you choose at least one to master. The two software programs I use for the bulk of my work are Adobe Photoshop, and iPhoto. Those two applications can get your "automatic" adjustments out of the way easily, and with Photoshop, you can set up actions to automate certain processes that may be common to all your images. Once I have the easy stuff out of the way, I can use other applications like Lightroom or Photomatix Pro to give my images an extra bit of flair that I couldn't easily do with my primary programs.

Regardless of what applications you are using, it is absolutely paramount that you at least color correct and clean your images in post processing if you want to compete with other portrait photographers for your share of the portrait photography market. Actually, I should say any niche in the photography industry. The more passionate you are about your photos, the more success you will accomplish as a result.

ThinkTunk.com

Recent Articles:

5 Easy Tips to Improve Portraits of Children
Camera Shy Subjects - The Art of Dealing with Photo Portrait Nightmares
Portrait Photography in Sacramento, California

Tuesday, May 5, 2009

Portrait Photography in Sacramento California

Thank you for your interest in Sacramento photography. The whole California photography scene is immensely popular, and every city, town, or dirt road that ends somewhere habitable in the state likely has some kind of club or network of people who share an interest in photography.

My name is Eric Courtney. I have chosen to focus on the photography scene in the Sacramento area, yet I will someday share my experiences that fall outside of that realm. While I was born and raised in the Carmichael area of Sacramento County, I have spent the last 11 years living in Anchorage, Alaska. In October 2008, I made the drive back down the Alcan Highway, filling memory cards for my camera along the way, and found myself back home in California. Since my arrival, I have found myself immersed in a thriving photography scene. To be specific, the portrait photography scene. I have met more models and fellow photographers in the last seven months than the entire 11 years in Anchorage where I worked in the media industry (worked around photographers all the time). Since photography is a passion for me, I think I am going to stick around Sacramento for a while.

Some of the ways I have started to network in the Sacramento photography circles is to attend photography workshops and join online photography Meetup clubs. All niches of photography are well represented, but the portrait photography niche in Sacramento is where I am marketing my services. Using social networks such as Flickr, Twitter, Facebook, MySpace and Model Mayhem also keep my name and work out in the open for all to see and take note for future projects. The higher quality of work you display on those sites, the more popular and sought after you become. I also try to join groups on social network sites that are regional based (i.e. Sacramento, Northern California, California, West Coast, etc.), that way you can put more effort into a workable and realistic marketing plan that is more concentrated to an area like Sacramento instead of trying to market yourself to the world from the beginning.

While the ring of my phone and email alerts are hardly deafening right now, I am looking forward to a prosperous and lucrative portrait photography business in Sacramento as I continue to participate in networking events and resources.

Stay tuned for my next article on post processing.

Keep snapping that shutter!

ThinkTunk.com

Recent Articles:

5 Easy Tips to Improve Portraits of Children
Camera Shy Subjects - The Art of Dealing with Photo Portrait Nightmares
Post Processing for Portrait Photography